Group Policy
Now we are going to play with group policy with users and computer policies. First we need to find where the policy is located.
The location of the policy has a effect on the ability to deploy the policy correctly in our domain. We are going to make a central store for all the policies for our domain.
The policies are in the form of ADMX files. ADMX files are available for all windows operating systems as well as some software like "MS Office" as well as third party software like "Google Chrome".
To do this we need to get the default policies from a windows operating system we want to enforce a policy on, and place them in a folder that is replicated across our domain.
Links to download the Administrative Templates files based on the operating system version
1. Download the ADMX files you require for the computers in the domain. Below are a selection of available ADMX files.
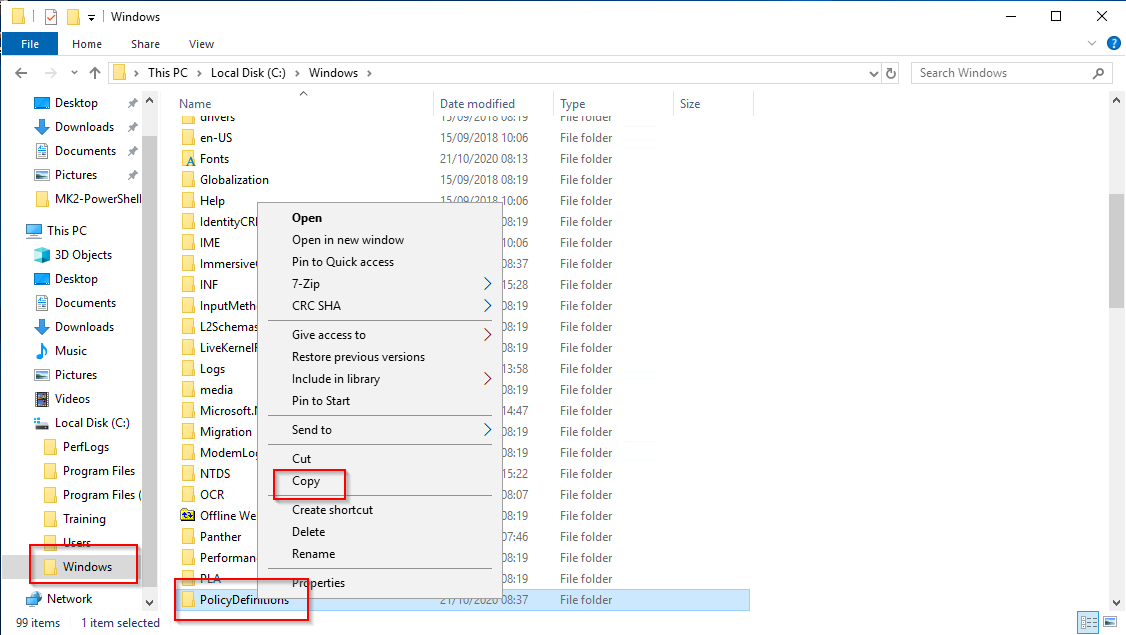
2. To take advantage of the benefits of .admx files, you must create a Central Store. This store will reside in the SYSVOL folder on a Windows domain controller. Copy the folder that is named PolicyDefinitions in the following location on the domain controller:
C:\Windows\PolicyDefinitions

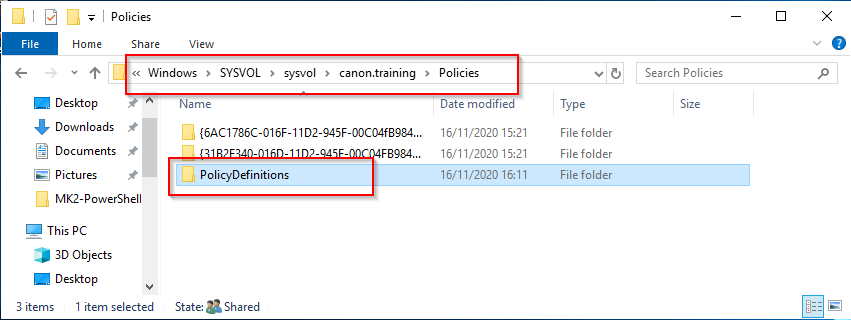
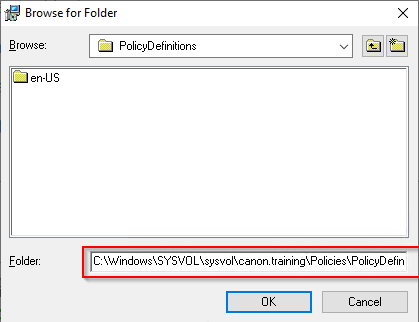
3. Paste the file in the following location.
C:\Windows\SYSVOL\sysvol\canon.training\Policies
4. Copy your downloaded ADMX files to the new policy store in SYSVOL on the domain controller. You may need to run the executable file if you downloaded the files from some sources.
C:\Windows\SYSVOL\sysvol\canon.training\Policies\PolicyDefinitions\
NOTE: The .admx files contained in the folder are the policies.
The .adml files are language specific and are stored in a language-specific folder. For example, English (United Kingdom) .adml files are stored in a folder that is named "en-UK”.

5. Open Group policy management from the tools menu in server manager.
6. Open the tree and the right click on the head office OU. Then select “Create a GPO in the domain and link it here”

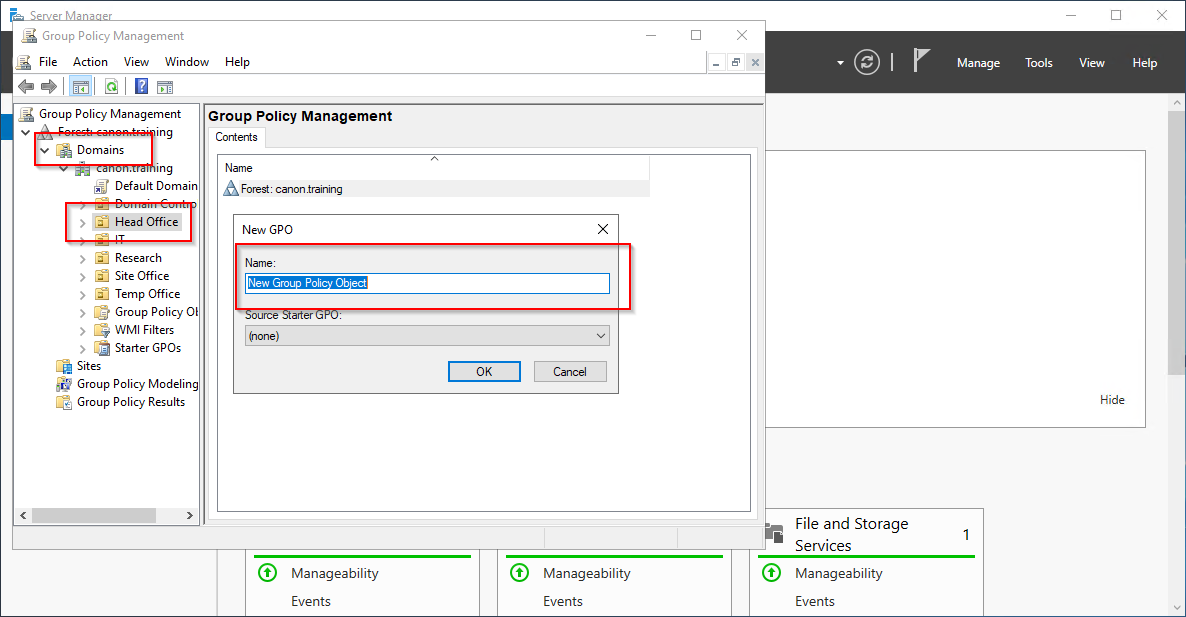
7. Name the new GPO “Head Office Users”
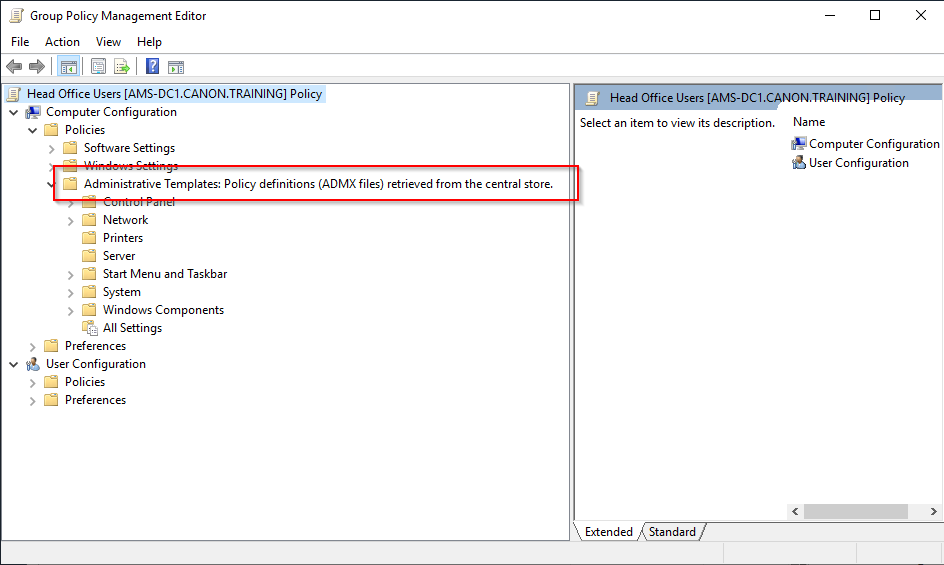
8. Right click the policy and open the policy editor using Edit. Then browse to
Computer Configuration/Policies/Administrative Templates.
Ensure that the message shows that the policy definitions have been retrieved from the central store.

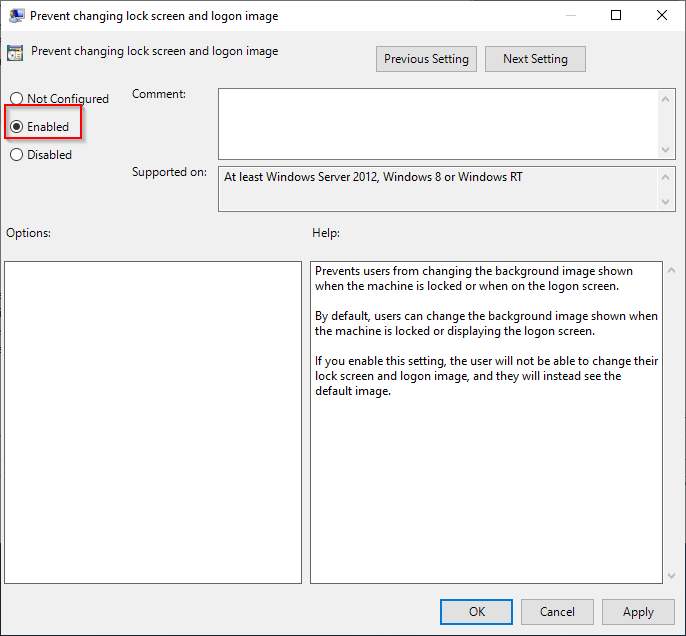
9. Browse to USER Configuration/Policies/Administrative Templates/Control Panel/Personalization. Then select Prevent changing desktop background.
Description:
Disables the Color (or Window Color) page in the Personalization Control Panel, or the Color Scheme dialog in the Display Control Panel on systems where the Personalization feature is not available.
This setting prevents users from using Control Panel to change the window border and taskbar color (on Windows 8), glass color (on Windows Vista and Windows 7), system colors, or color scheme of the desktop and windows.
10. Enable the Policy. You can also try enabling the prevent change colour and appearance policy.

11. Switch to AMS CL1 then login with canon\D.Johnston and Canon-01.
NOTE: You will see an error showing that the user must be a part of the remote admins group, you will need to login to the AMS-DC1 with the administrator account and add the user to the Remote Administrators and Remote Desktop users groups.
12. Log back in with the D.Johnston account. It may tack a short while for the login to be available.
NOTE: Some policies need a restart some simply an update using gpupdate/force.
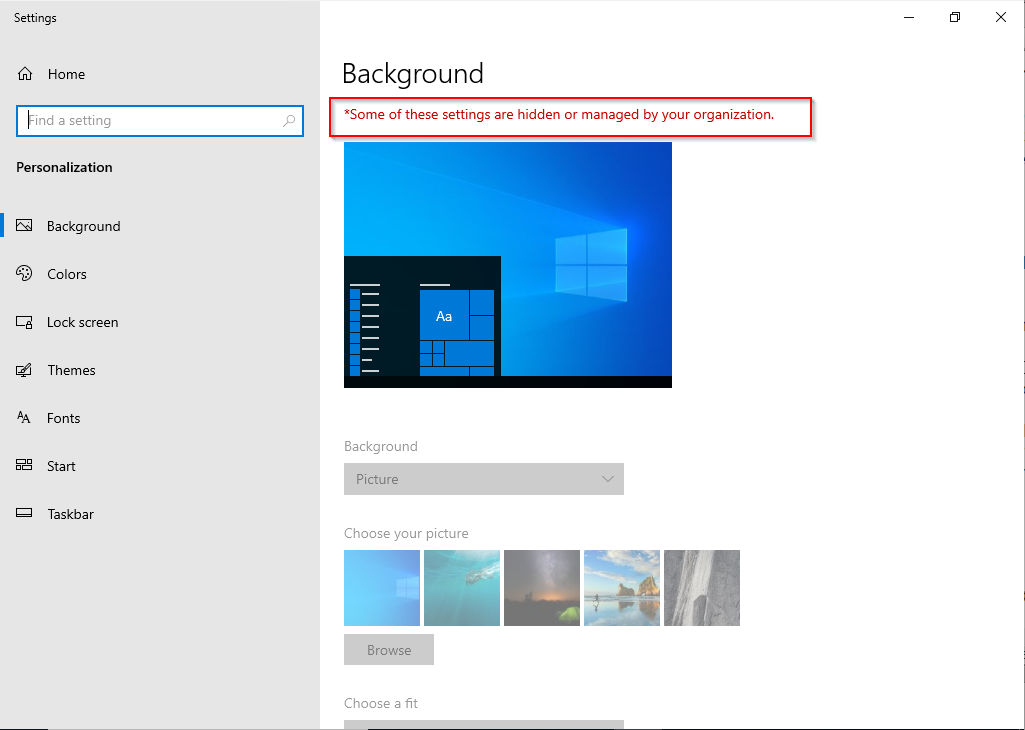
13. Test the policy was installed by accessing the personalisation settings of the client.

14. Now look at the result of the policy using rsop.msc. Open the run command – Right Click start and select “Run” – type rsop.msc then “OK”
15. You may get a warning that the user settings only will be displayed as the user has insufficient rights to view the computer settings.
16. This will display only the policies active on the machine.
Policy deployment Windows 10, MS Office and 3rd party software.
1. Open AMS-DC1 and log in as Canon\Administrator with Canon-01.
2. Locate and open the Administrative templates for Windows 10. Remember these are all the ADMX file available for windows 10 operating ststems.
3. Select for Everyone and browse to the Policy deffinitions file you copied earlier.

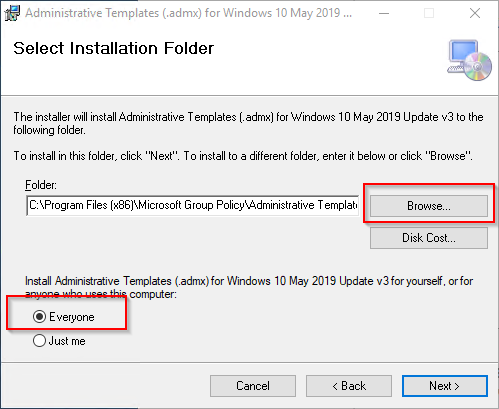

4. Confirm and Install. Then Close the wizard.
5. Browse to the folder containing you policy definitions. Now you will have all the language files for administering Windows 10 Group Policy.


6. The Windows 10 ADMX package no longer has the ADMX file for MS office included. Look for the Microsoft Office ADMX files and add them to the central store. Why do you think Microsoft have dropped the packages? Answer at the end of this task.


7. Finally install the ADMX file for a third party software title. Use Google Chrome, there are packages available for many other software titles, Adobe for example.
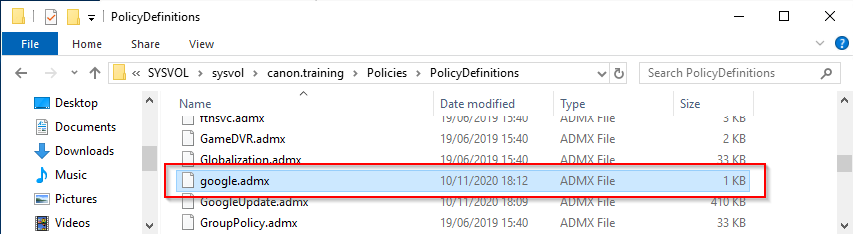
8. Download the Google enterprise package. This contains many other tools but we are only interested in the ADMX files.
9. Copy the ADMX files to the Central Store.

Deploy policies to check functions.
Use any remaining time to have a go at deploying any policies from the store you created. Use the OU for Site Office to test some policies to prevent access or changing items without admisintrator assistance.
NOTE: Remember some need a reboot others a gpupdate /force. Use the ROSP to check the policy is deployed. How can you use the knowledge gained her to help you find policy restrictions when troubleshooting?
ANSWER: Office 365 and Azure do not require ADMX files.
 |