Active Directory - Password Policy
Setting a Password Policy
Now we are going to look at the default domain policy. This policy is used set many default security and user options for the domain. It is best practice not to change this policy but setting password policy for the domain is often an exception. It is common to edit the password preferences in the domain policy.
The domain password policy has the setting shown below, as well as many others. These are the settings you will configure for your domain.
| Policy Setting | Default Setting Value | Change Setting |
| Enforce password history | 24 days | 24 days |
| Maximum password age | 42 days | 30 days |
| Minimum password age | 1 day | 0 days |
| Minimum password length | 7 | 9 |
| Password must meet complexity requirements | Enabled | Enabled |
1. Start the AMS-DC1 virtual machine if not already started.
2. Login with the credentials canon\your username and password Canon-01. This will work as you are a domain administrator so have full rights. You could simply use the administrator account.
3. Open the Group Policy Management from the tool menu from server manager.
NOTE: Group Policy Manager is where you set the policy for the domain. The Domain Password settings are included in the “Default Domain Policy”. It’s not usually suggested to edit this policy but the passwords are often an exception.
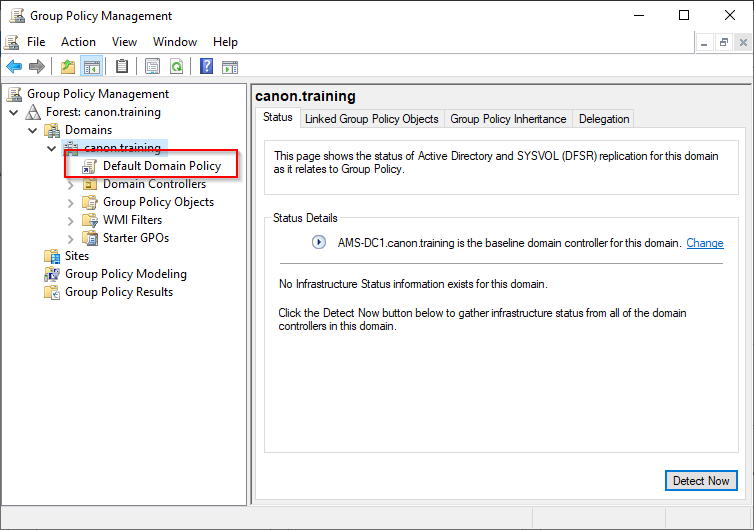
4. Right Click on the policy and select edit ensure you do not accidently select enforced, if you do simply deselect it.
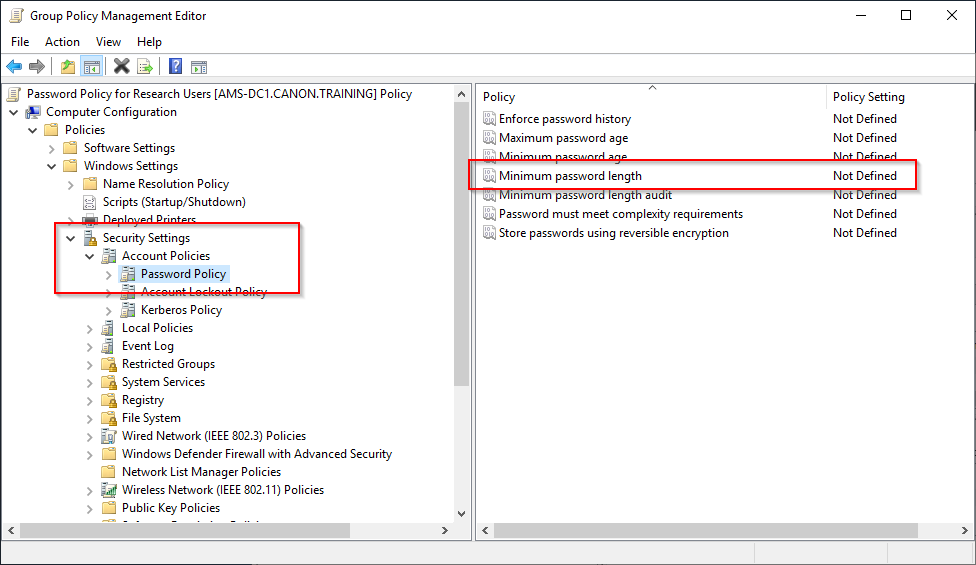
The Policy Editor.
This is where you can make changes to the existing policy. The password policy is part of the Computer Configuration. That is where you will make the changes.
1. Browse to the following policy – Computer Configuration – Policies - Windows Settings - Security Settings – Account Policy – Password Policy

2. Set the policy to match the settings in the table at the top of this page.
3. Open PowerShell or a CMD prompt t perform a forced Group Policy Update gpupdate /force. This will update the policy but some changes will need a restart. (Password Policy does not).
4. Now switch to the client machine AMS-CL1. To test user’s logins.
NOTE: It is important to join the server to the domain. The first step is to add the client computer to the canon.training domain.
5. To join a Domain, you must first ensure you have the following information and resources:
- A Domain Administrator Account, this information you can get from your Network Administrator.
- Name of Domain. (FQDN)
- A computer running Windows 10 Pro, Education or Enterprise editions.
- Domain Controller must be running Windows Server 2003 (functional level or later).
- The Client must be in the same physical / virtual network as the domain controller.
Join a Windows 10 PC or Device to a Domain - This should already be completed in Task 5
1. On the Windows 10 PC go open the Control Panel.
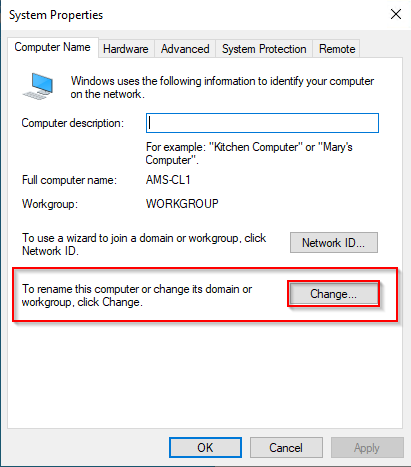
2. Select System and Security then System then scroll down to “advanced system settings” then under the name tab select the domain radio button.


3. Select “Change”.
4. Enter the Domain name and click OK.
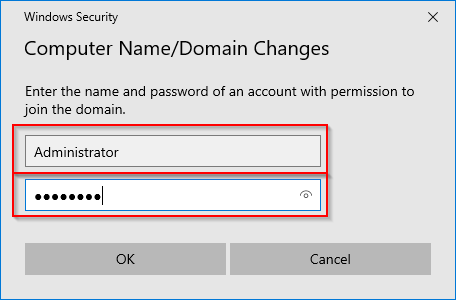
5. Enter account information for a domain administrator account which is used to authenticate the user to be able to allow the new computer to join the domain. In this exercise we use “Administrator” and “Password supplied by trainer”
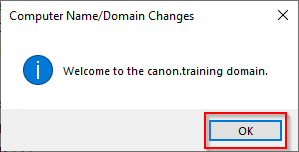
6. Click OK. Wait while your computer is authenticated on the Domain.
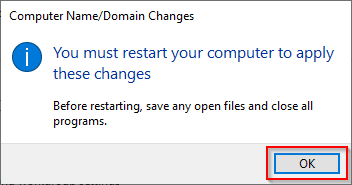
7. A restart will be required to complete the join. Perform the restart.
Continue from here if your AMS-CL1 was already domain joined.
6. Login to the Client as canon\(your username) using the password you selected.
7. You will login correctly as you have not yet changed your password.
8. Return to AMS-DC1. Users and Computers - Account tab - uncheck "user must change password at next logon" if checked, should be showing "user cannotr change password" and Apply if not.
9. Right click your user and select "Reset Password"
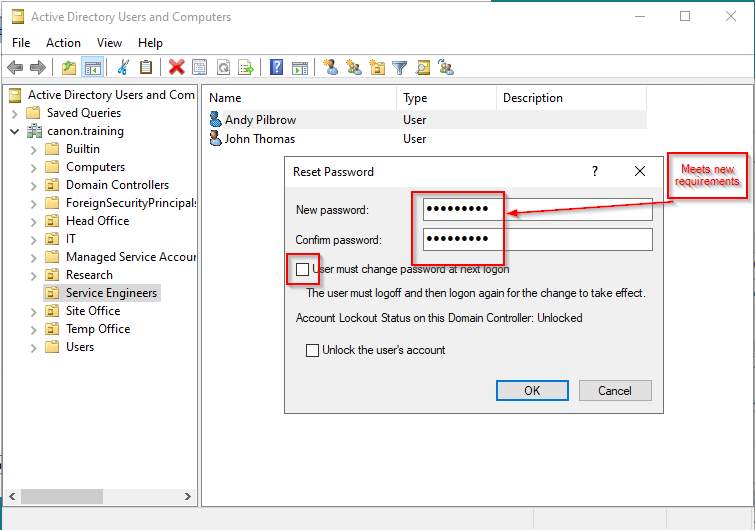
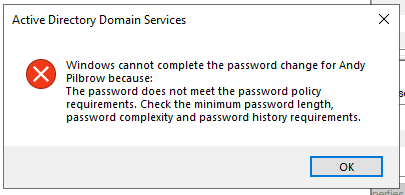
10. Untick the "User must change option" then type a new password that conforms to the new policy. If it does not you will get the following error.
11. Now try to login to the AMS-CL1 client with the new password. This time you should succeed with the new password.
Conclusions: You cant force a remote user to change password at next login. This is only possible with a physical machine or with other policys configured.
Create a Password Policy for only an OU.
1. Now login to AMS-DC1 again as Canon\Administrator or your Canon\Domain Admin account.
2. Open AD Users and Computers. You will now create a user group for further administrative processes. You will use it to grant remote access to a group of users from different OUs.
3. Right click the domain canon.training and then select New then OU. Name it Remote Desktop users.
3. Right click the Remote Desktop Users OU and then select New then Group
4. Name the group CT-Remote-Users this group will be a "global" so available to the domain and any sub domains and a "security" group not a distribution group.
5. Add the following users to the group. Right click and select "add to group" you will only see groups and builtin groups in this view. You cant see the user accounts.
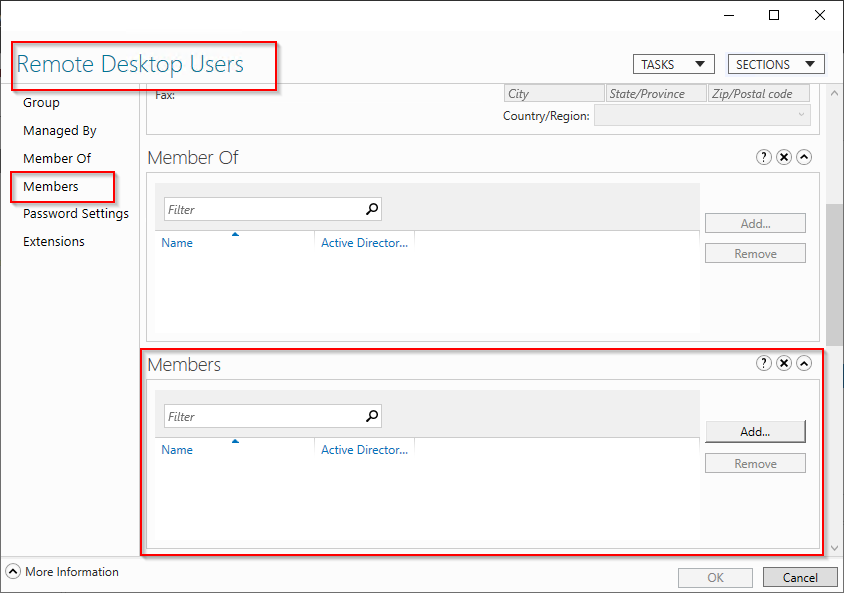
6. Now open the new CT-Remot-Users group and select the members tab. Here you can add the members. Then "Apply"
| Lisa | Clever | Research | L.Clever@canon.training | Research Manager |
| Dave | Johnston | Head Office | D.Johnston@canon.training | Managing Director |
| Andy | Palmer | Site Office | A.Palmer@canon.training | Site Manager |
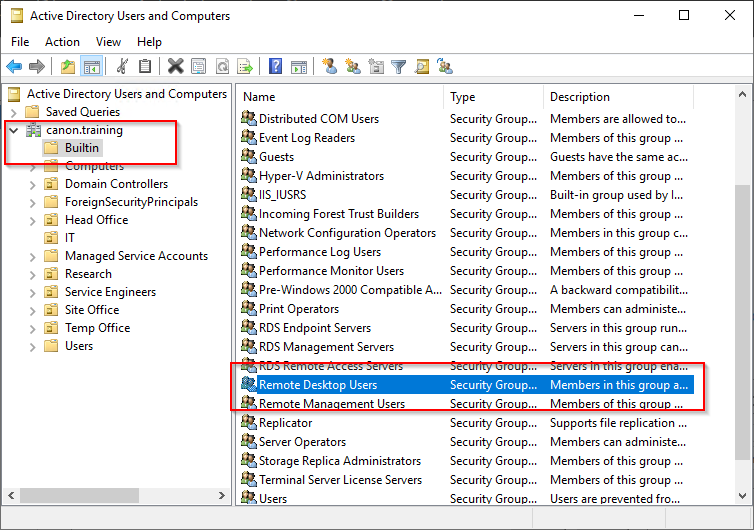
6. Now you will need to add the CT-Remote-Users group to the built in group "Remote Desktop Users"
7. You will now need to login to the AMS-CL1 and add the remote users group to the device remote user access list.
8. From the Control Panel - Select System and Security then System then scroll down to “advanced system settings” then under the Remote tab select users and add the CT-Remote-Users group.
NOTE: Domain and Local administrators will not need to be added as they always have access to remote login. You will use all these users in the following exercises. Users will be used to test settings configured to logins. This is how to allocate user rights using groups.
Now you will create a password policy for the Research department computers to ensure they are more secure than the standard policy.
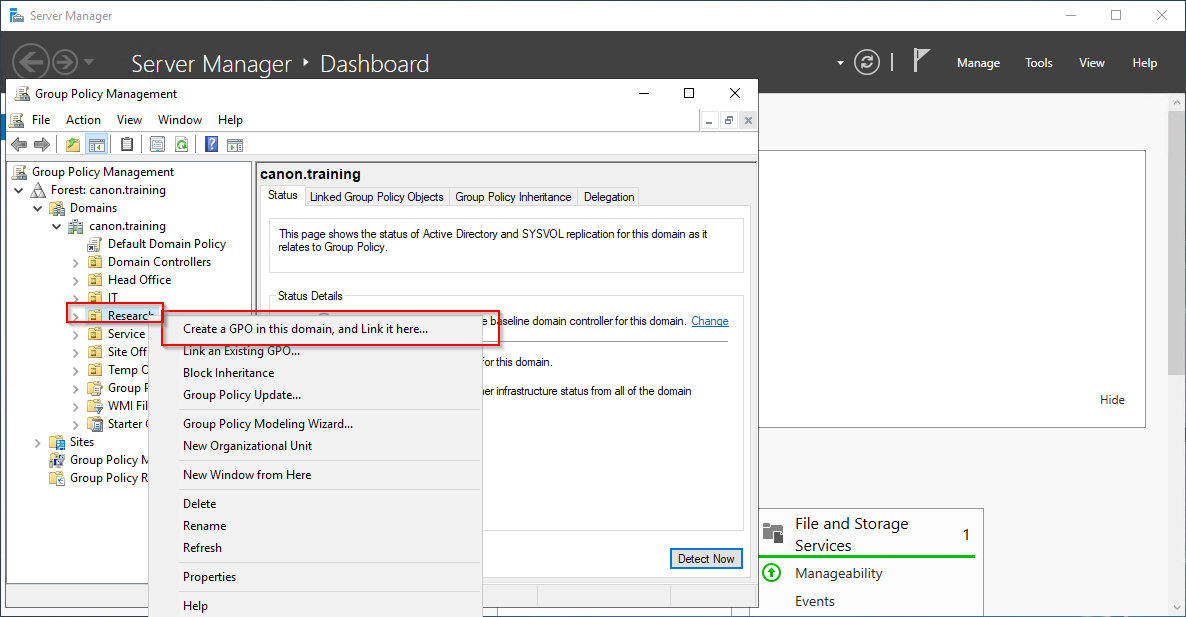
9. Open Group Policy Management snap in from the Tools menu in Server Manager.
10. Right Click on the Research OU and the create a New Group Policy Object. It important to link it to the Research Users as you will see later. Select "Create a GPO and link it here"

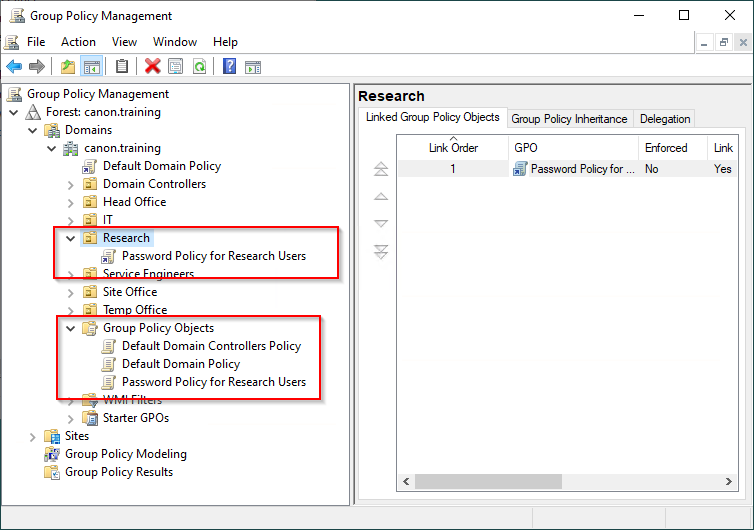
11. Name the new policy with something sensible for other users to understand, why its created and what its general purpose is. I have used "Password Policy for Research Users". Do not select a starter GPO.
12. Refresh the view. The policy will be shown linked to the research OU but will actually reside in the “Group Policy Objects”.
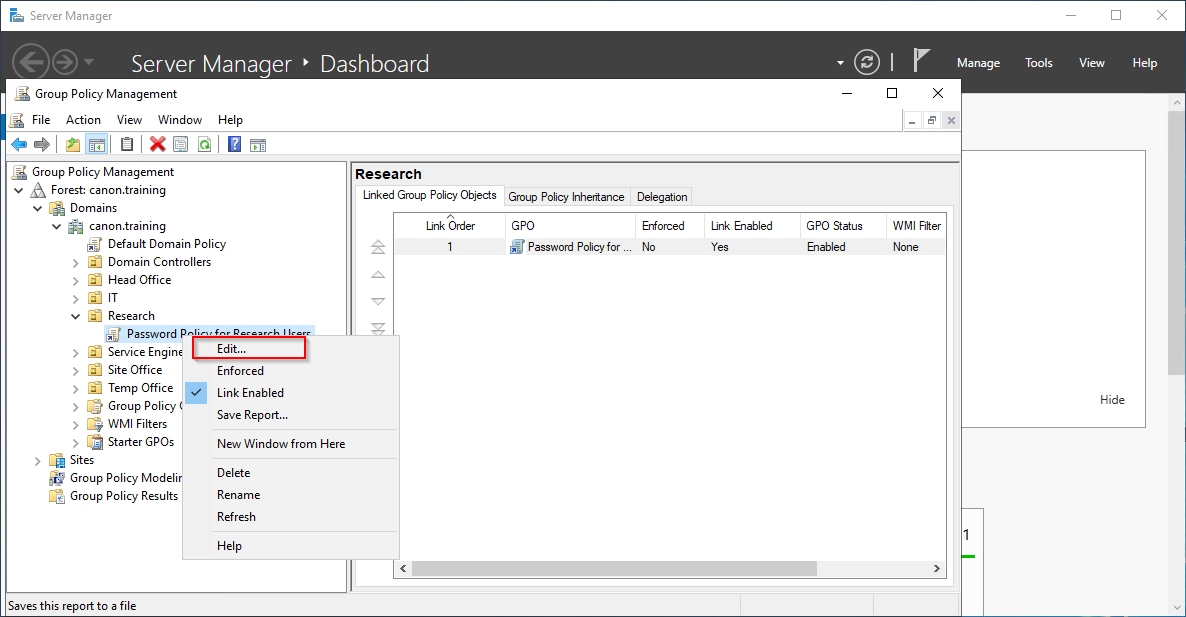
13. Now right click to open the editor for the new policy.

14. Browse to the password policy. Change the policy to have a minimum of 10 digits in the password.

15. Now we test the Policy has been enabled. Repeat the process you did to change you password for Lisa Clever from the R&D departmnet. You can still add a 9 digit password. You can also still use that password to logon to AMS-CL1.
NOTE: This may be due to the computer policy and the fact your account is a domain admin and not in the OU with the applied policy.
16. Switch to AMS-DC1 and move the Client computer to the Research OU.
17. Restart the computer to apply the policy. Then login with L.Clever and the last password you set. If you have forgotten simply reset it in the DC.
18. Now you will reset Lisa`s password as if you were Lisa. To do this you would use "Ctrl-alt-del". Due to the remote session we cannot, so we will use the OSK (On Screen Keyboard) to perform the task. Type OSK in the search bar and then open the keyboard.
19. Now on your keyboard hold the ctrl button and the alt buton and use the mouse and OSK to select del. You will see the password change screen. Close the OSK if in the way.
20. You will find that the password can still be put in as only 9 digits.
Conclusion: This methot to restrict users will not work.
Apply a fine grain password policy.
1. First we will need to return to AMS-DC1 and create a new security group containing the users in the Research OU. Well any that require the new password policy.
2. Create a new group in the Research OU called Research_Secure_Password with "global" scope.
3. Add all the users from the OU to the group. Ensure at lease Lisa is included.
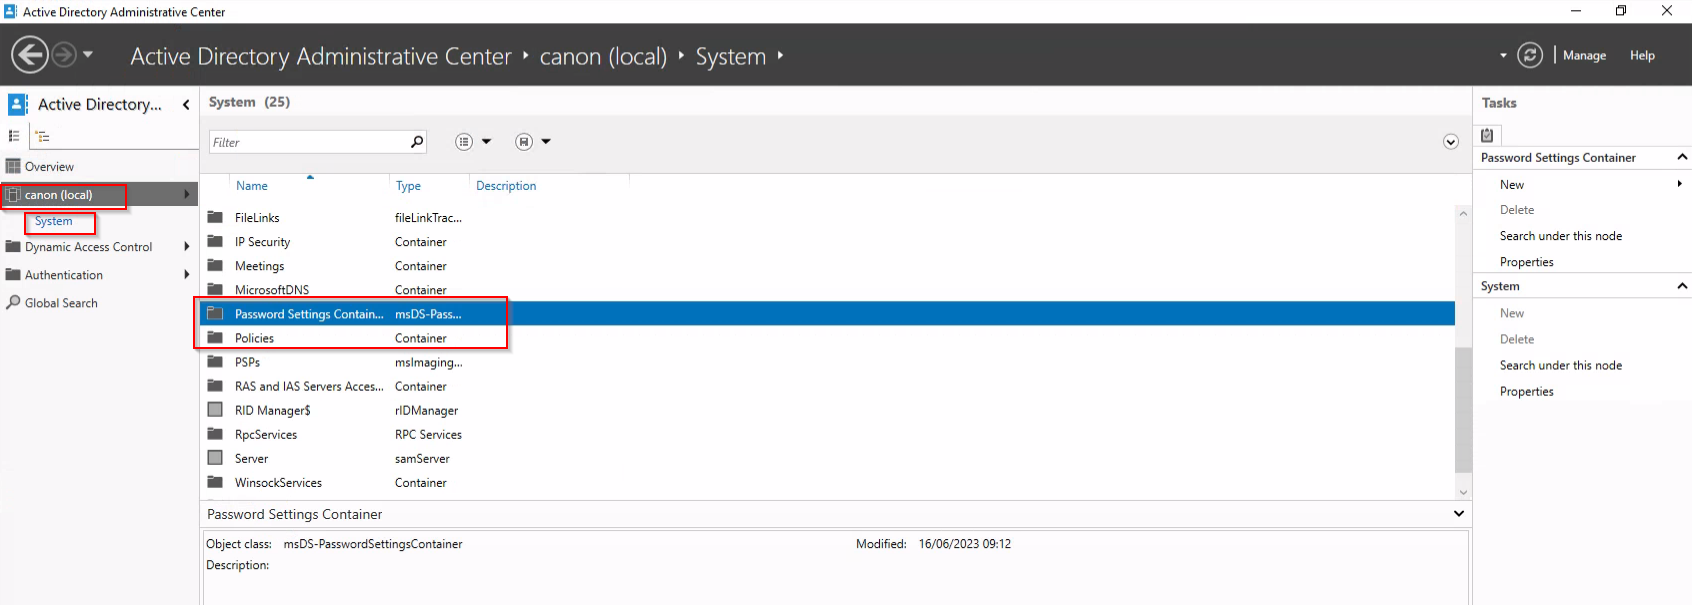
4. We will use (ADAC Active Directory Administrative Center). The instructions to use PowerShell are included below.
5. In Active Directory Administrative Center, navigate to the Password Settings container under System and create a new PSO.
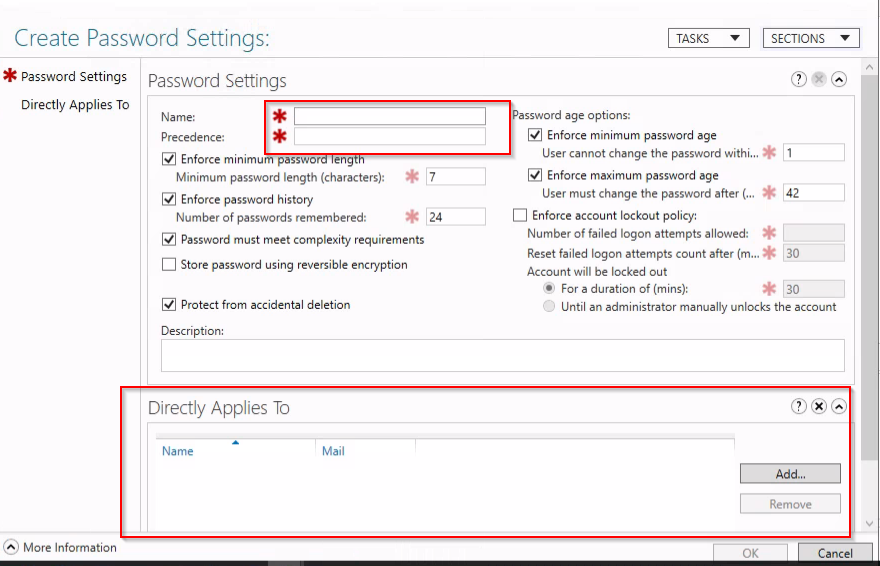
6. Set the following: Name = Research_Users, Precedence = 1, Minimum Password Length = 10, and select the Research_Secure_Password in the "Directly applies to" section. Once you’ve configured the password and account lockout policy settings for the PSO, apply it to one or more global groups.
7. Now try to change Lisa`s password with the "AD users and computers", "ADAC" or using the OSK method and you will be forced to add a 10 didit password.
Using PowerShell
Use the New-ADFineGrainedPasswordPolicy PowerShell cmdlet to create a new PSO.
New-ADFineGrainedPasswordPolicy -Name Research_Users -DisplayName Research_Users -Precedence 1 -ComplexityEnabled $true -ReversibleEncryptionEnabled $false -PasswordHistoryCount 10 -MinPasswordLength 10 -MinPasswordAge 3.00:00:00 -MaxPasswordAge 30.00:00:00 -LockoutThreshold 3 -LockoutObservationWindow 0.00:25:00 -LockoutDuration 0.00:30:00
And then apply the new PSO using Add-ADFineGrainedPasswordPolicySubject
Add-ADFineGrainedPasswordPolicySubject -Identity Research_Users -Subjects ‘Research_Secure_Password’
Fine-Grained Password Policy Implementation Best Practices
When implementing Fine-Grained Password Policies in your organization, there are several things to think about before creating and applying Fine-Grained Password Policies.
1. Each PSO must have a precedence index number. PSOs with a higher precedence index, like 1, take priority over those with a lower precedence index, like 10.
2. PSOs can be applied to users and groups. When possible, apply PSOs to groups.
3. Understand PSO precedence. While PSOs can be applied to multiple users and groups, only one PSO ever applies to a user account. The PSO with the highest precedence index, i.e. closest to 1, will apply. The msDS-ResultantPSO attribute in AD exposes the resultant PSO for a user object if you want to check it. PSOs linked to user accounts always take precedence over those linked to groups.
 |