Active Directory - Server Name & Static IP Address
Re-Name the Server and Make the IP address static.
In order to install Active Directory and create a domain we need to have a dedicated server known as the domain controler. As part of theis course you will build a Windows Server Domain Controler.
The first step in this process is to re-name the server and ensure it has a static IP address. A static IP address is required for any domain controler.
Re-Name the Server
1. Connect to the CEL virtual classroom as instructed by your trainer.
2. Access the AMS-DC1 template virtual machine in an RDP window or via MRemote, again as instructed by your trainer.
3. Login with the credentials canon\administrator and password "Supplied by you trainer".
4. From Server Manager - Select Local Server.
5. Click the Microsoft generated Computer Name then select Change
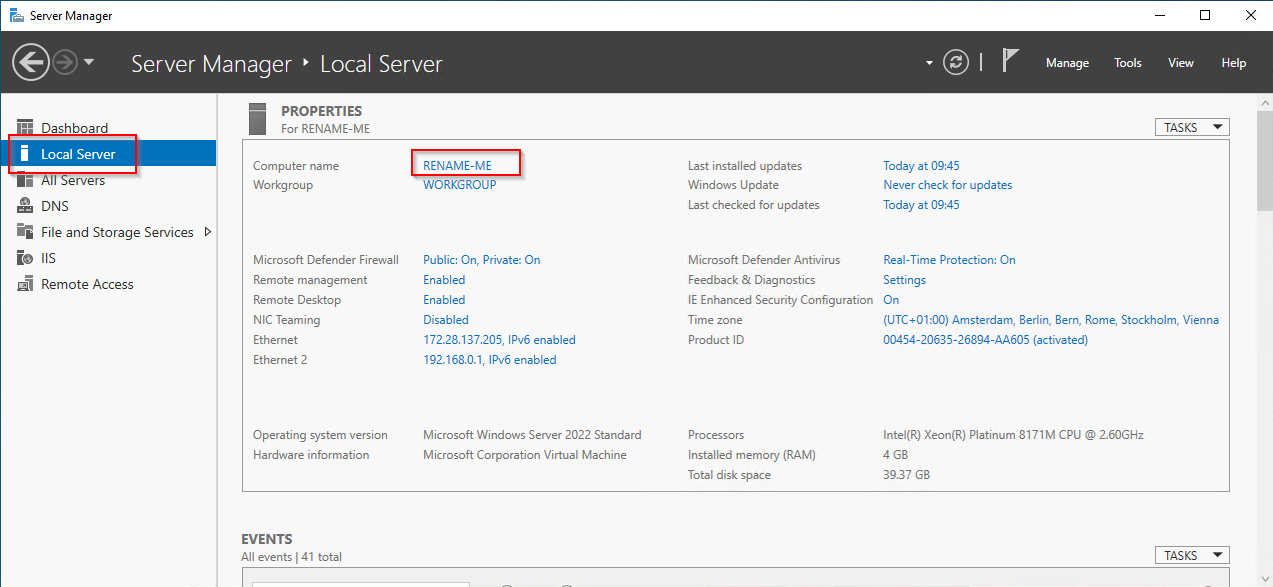
5. Rename the computer as “AMS-DC1” If it is not allready. I you were to be using a new install of windows server the name would be similar to this "WIN-3NB24EJQJJO"
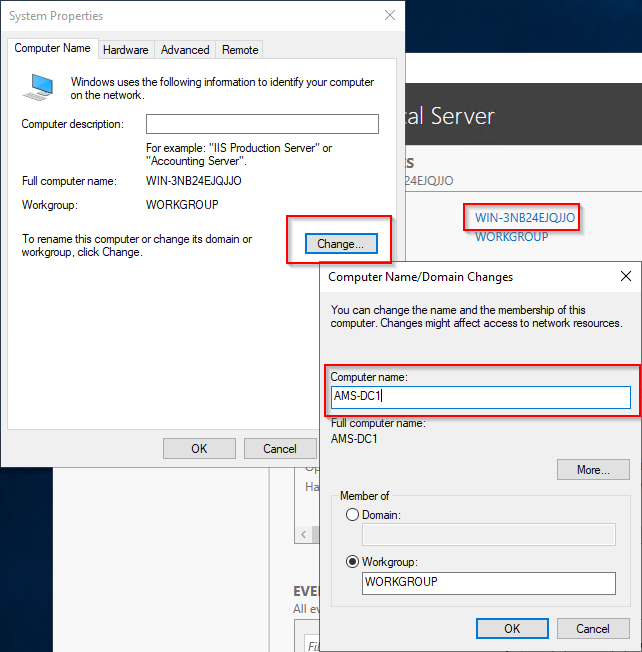
6. Click OK
7. A restart will be required.
8. Click OK and Close.
Do Not Restart until after the IP address change.
9. Select Restart Later
Check the Server IP is Static
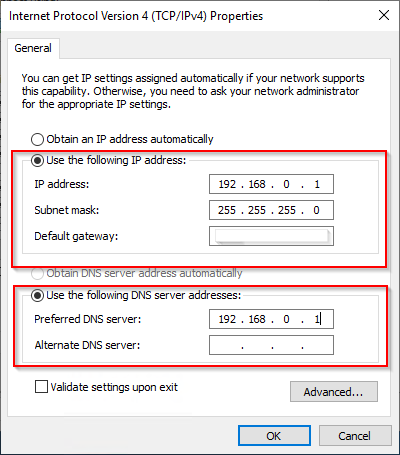
A requirement for a Domain Controller is to have a static IP address. It must always be in the same address on a network. Servers are situated in specific ranges not included in DHCP scopes. Check the IP settings for the DC to ensure you are aware of the settings.
NOTE: Be carefule to only edit the internal NIC if required.
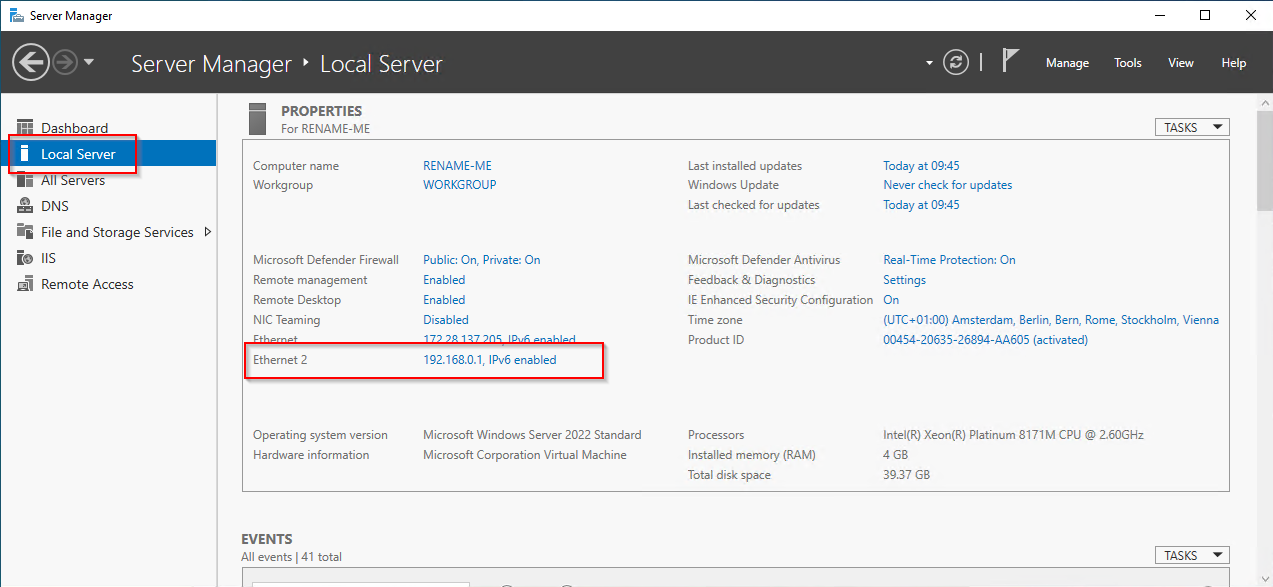
1. From Server Manager - Select Local Server if not already.
2. Click on the IP Address - It will be shown as IPv4 address assigned by DHCP.
3. Right click the network interface and select properties. Then select IPv4.
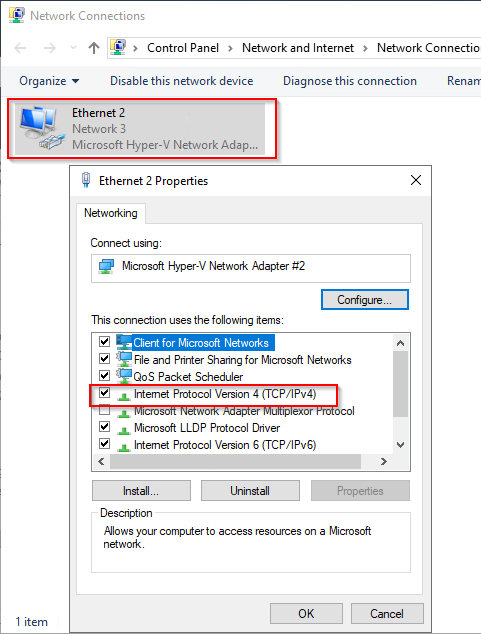
4. Enter the fixed IP details below if not allready been done. Leave the gateway blank as the default gateway will remain on the external NIC, then click OK.
5. Now a restart will need to be performed, if you made changes.
 |