Tasks
Local Host File
This exercise will allow you to experience how a local hosts file works, a great place to start learning about how DNS starts its lookup.
1. Log in to “AMS-CL1” using the “canon\administrator” administrator account.
2. Locate your hosts file on the client machine.
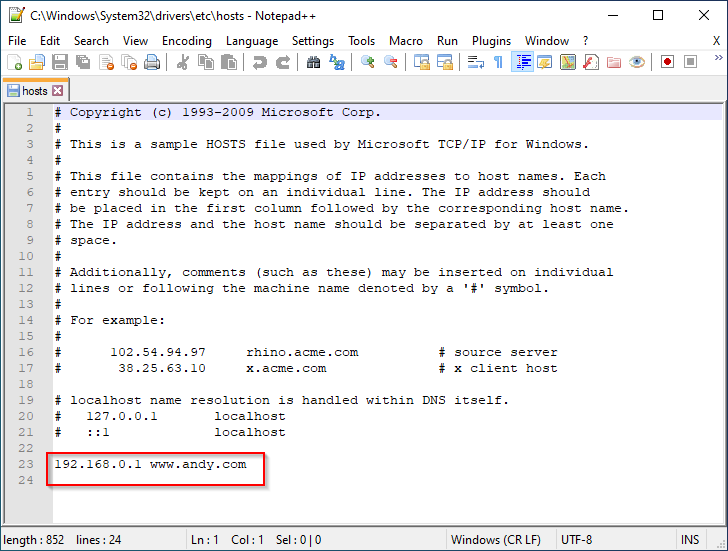
c:\windows\system32\drivers\etc\hosts
3. Copy the host file to your desktop.
4. Open the host file using notepad, notepad++ on the client or any editor of your choice. The screenshots provided are using notepad++.
5. Add the following text to the bottom of the file:
192.168.0.1 (yourfirstname).com
Leave the host file to desktop as the original location is protected and required administrator authentication before changes can be made.
6. Close the hosts file.
7. Remove the .txt file extension. You will get a warning that the file will become unreadable, click OK.
8. Move the file to c:\windows\system32\drivers\etc\hosts replace the original file and click OK on the administrator access.
9. Open a web browser and type in the URL box (yourfirstname).com
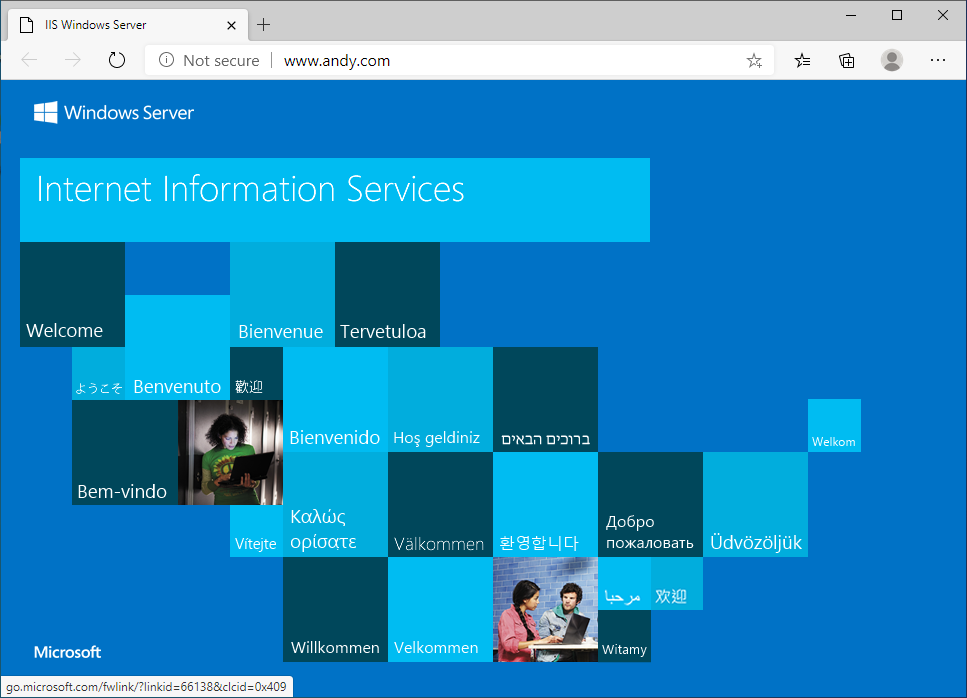
You should be linked to web service of AMS-DC1. Close the browser.
10. Edit the host file again only this time we will block a DNS name by redirecting it to 127.0.0.1.
11. Open a browser and check you can see the site for NASA at www.nasa.gov
12. Make the following addition below your last entry. 127.0.0.1 www.nasa.gov
13. Save the hose file and overwrite the one in c:\windows\system32\drivers\etc\hosts.
14. Try to access nasa.gov from your web browser. You should get and unable to connect screen.
DNS Settings
Now we will have a look at the DNS snap in on the server to see all the items we have been discussing.
1. Open the DNS snap in from the server manager window. Use the tools menu and select DNS.
2. Open the DNS tree in the left pane. You will see “Root Hints” displayed on the left.
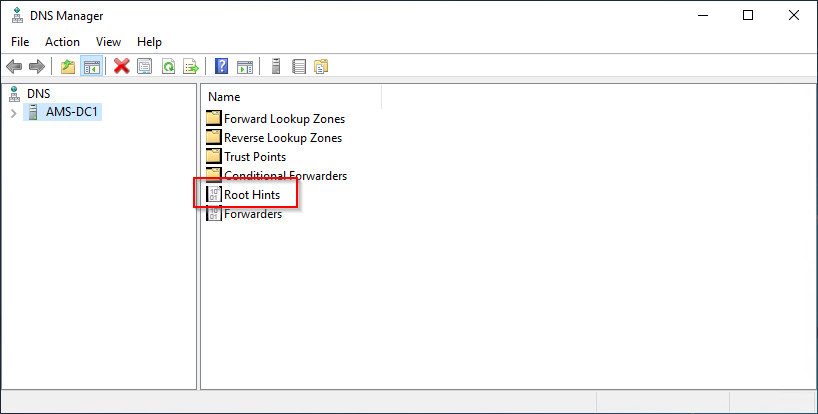
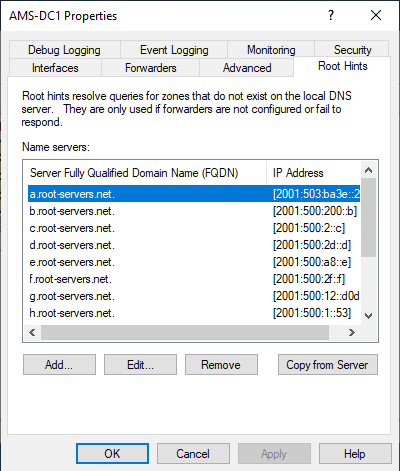
3. Open the root hints to display the root servers used by the DNS on the server. These are the official registered TLD server locations. Here is where DNS finds the root to begin a new lookup.
Root hints resolve queries for zones that do not exist on the local DNS server They are only used if forwarders are not configured or fail to respond.
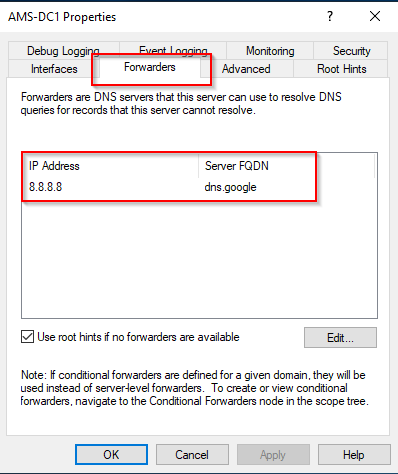
Forwarders.
A DNS forwarder is a DNS server that is used to forward DNS queries for external DNS names to DNS server or servers outside that network. It does it for all DNS queries that it cannot resolve locally, DNS queries that it has no personal knowledge of.
1. Here is defined the location of another DNS server which can be used to forward requests before resorting to using the root hints.
2. On AMS-DC1 all queries are forwarded to the external network DNS servers.
3. On AMS-DC1 add a forwarder to 8.8.8.8 the google public DNS.
4. Move it to the top of the list. The forwards will follow the order of the list.
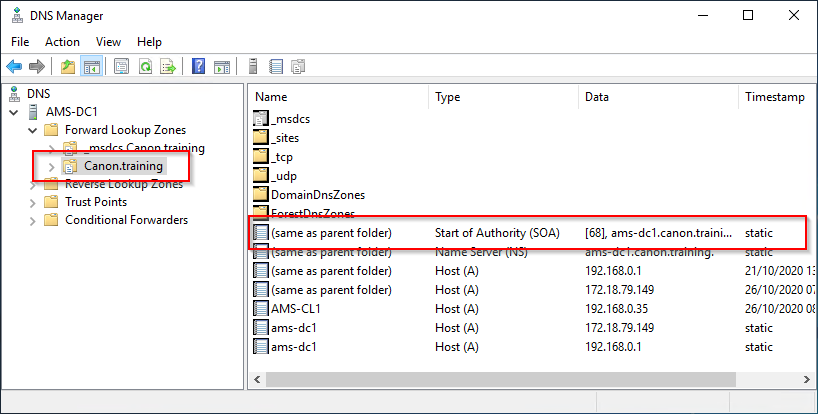
5. Now lets look at the start of authority record. Remember this is where our server takes over authority for the naming of our network devices. Open the “Forward Lookup Zones” then “Training” from the tree.
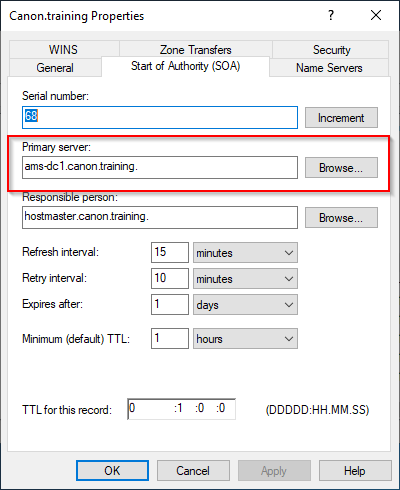
6. Right click SOA record and look at the properties.
7. Close the SOA Record.
8. Next in the same part of the tree you will find the HOST (A) records for our network. Open one and look at the details.

A and AAAA Records
Both records map a host to an IP address. The "A” record is used to map a host to an IPv4 IP address, while “AAAA” records are used to map a host to an IPv6 address.
The general format of these records is this:
host Host (A) IPv4_address
host Host (AAAA) IPv6_address
1. So since our SOA record in the above example is, a primary server at “ams-dc1.canon.training”, we would have to map this to an address to an IP address since “AMS-DC1” is within the “canon.training” zone that this file is defining.
The record could look something like this:
ams-dc1 Host(A) 192.168.0.1
Notice that we don’t have to give the full name. We can just give the host, without the FQDN and the DNS server. However, we could just as easily use the entire FQDN if we feel like being semantic:
ams-dc1.canon.training Host(A) 192.168.0.1
2. In an A record is where you’ll define your web server for the DNS service, as “www”. Right click in the details pane to create a New Host(A) record for the web service on the local server.

3. Click add Host and click OK then Done.
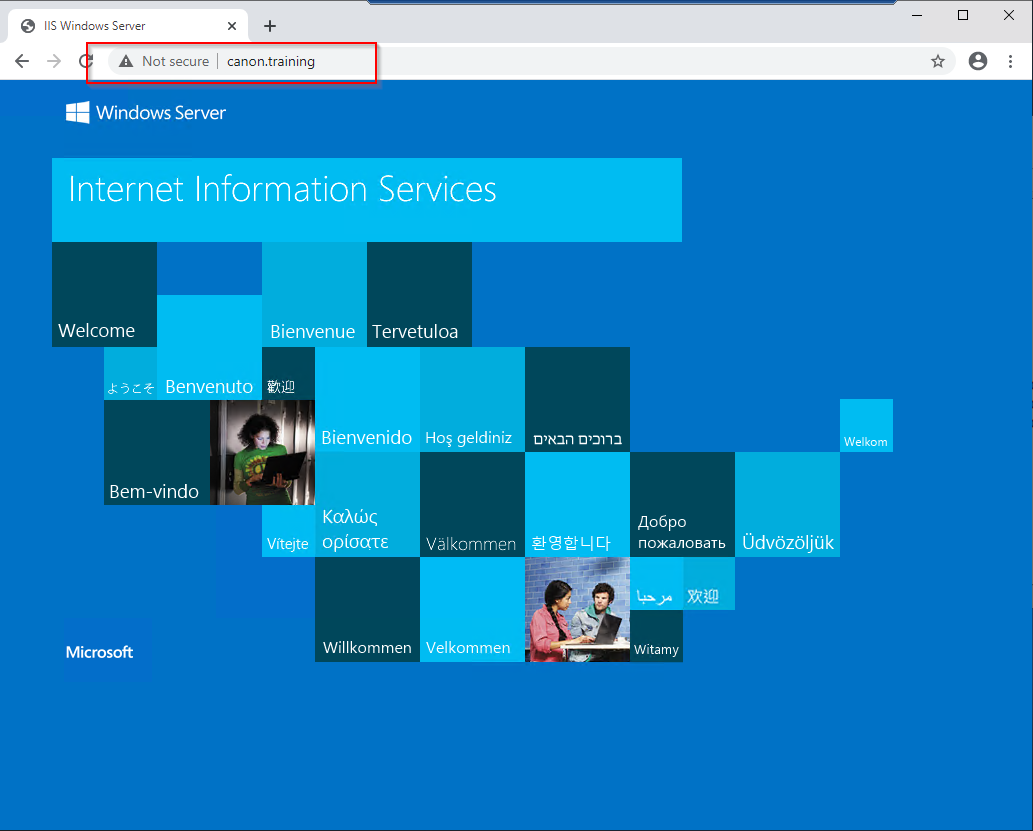
4. You will see the folowing record. www Host(A) 192.168.0.1
5. Swich to the Client machine.
6. Open a web browser and type canon.training. You will be directed to the web service.
All this works just as well with AAAA records for IPv6 addresses.
Reverse Lookup in DNS
You need Reverse DNS to match IP Addresses to Host Names. Its easy to define a reverse lookup as the opposite of forward lookup. A reverse lookup zone is used any time you want to convert an IP address to a name. Many times having the reverse lookup zones can be helpful to troubleshoot or investigate issues.
Reverse DNS Lookup Zone Example
The reverse zone you will create is for 192.168.0.0/24. It is important to note that the zone name is actually 0.168.192.in-addr.arpa. The IP is reversed in the lookup so that it is easy to put the last octet for the IP address.
DNS PTR records are used in reverse DNS lookups. In this exersise you will create a reverse lookup zone and then create a couple of PTR records.
1. Using the DNS snapin. Right-click your server name and choose “New Zone”. That will open up a New Zone Wizard.
2. Click “Next” on the first window.
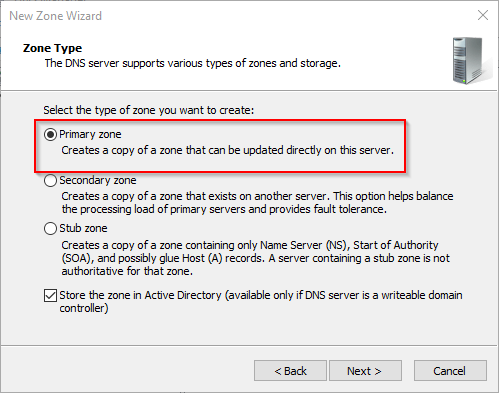
3. Choose “primary zone” and hit “Next“
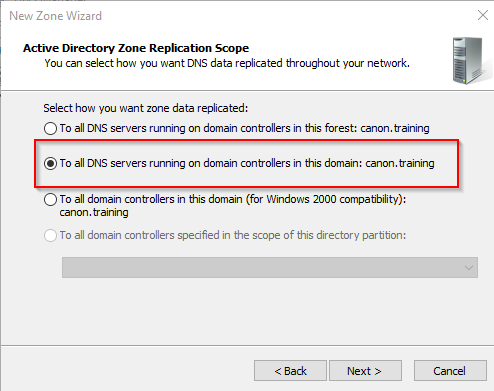
4. Enable replication of the records to all domain controllers in the canon.training domain.
5. Select "Reverse Lookup" zone.
6. Select "IPv4".
7. Enter NetworkID. In this step, you can either enter NetworkID or Reverse lookup zone name. (192.168.0)
8. Input Zone File name. The auto-created file name is sufficient for this step. You can leave it that way not unless you really need to change it.
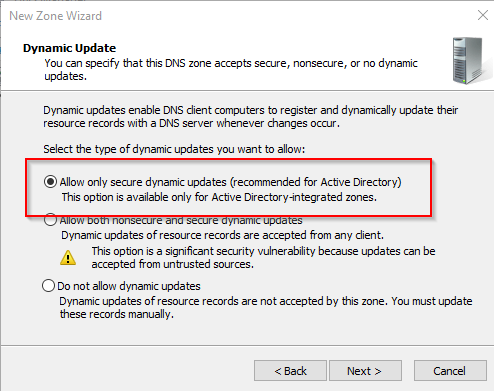
9. Next we decide if you want Dynamic Update. Just click “Next” here to keep the defaults (only secure updates).
10. Click on “Finish“
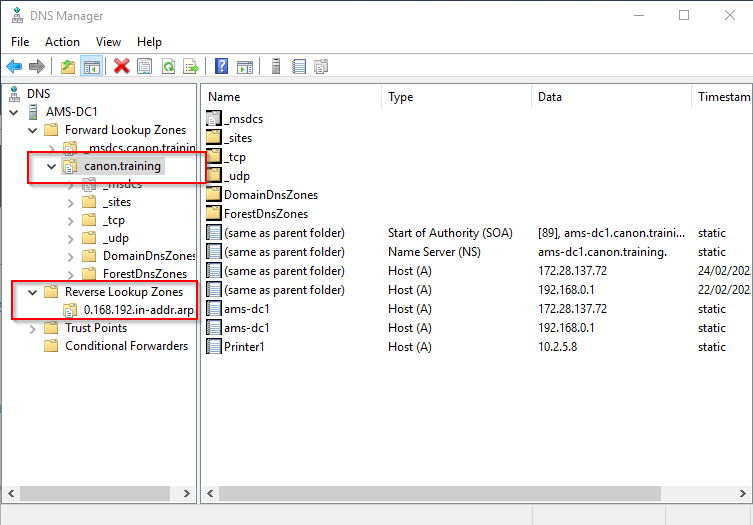
11. Confirm your settings. Go to DNS Manager and check your Reverse Lookup Zones.
Test the Reverse Lookup is working as expected.
1. In DNS manager check the reverse lookup zone exists.
2. Select the forward lookup zone.
3. Open the properties of the AMD-DC1 record for the local IP (192.168.0.1)
4. Locate the PRT record update tick box and select it.
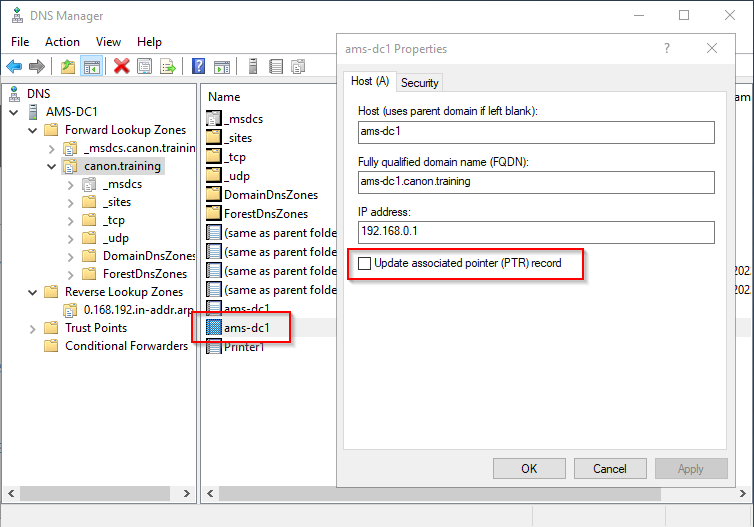
5. Apply the update.
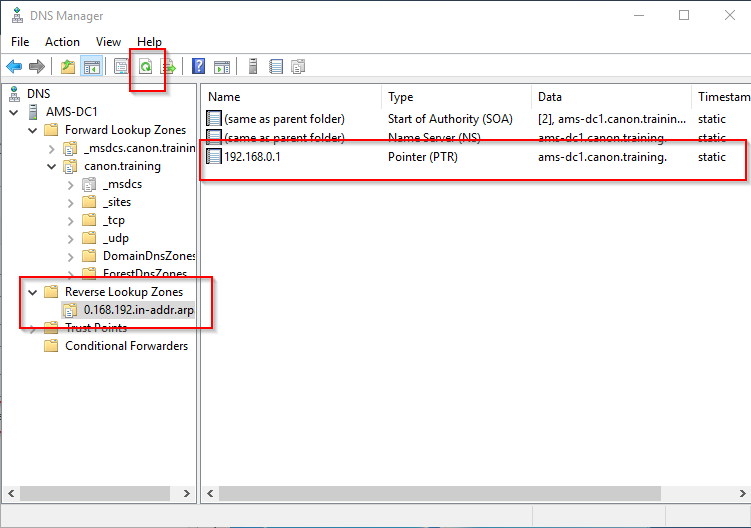
6. Open the Reverse Lookup Zone. Refresh the view and check the new record is shown.
7. Right click to create a new PRT record.
8. Create a new (A) record for 192.168.0.70 with the name test. Ensure you select the PRT record.
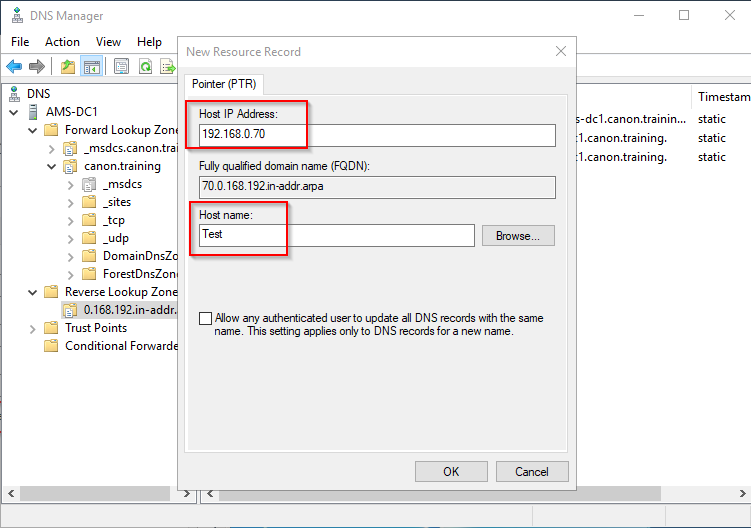
9. Save the record
Switch to AMS-CL1
10. Open a CMD or PowerShell window.
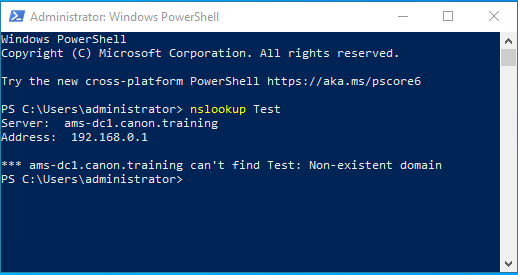
11. Perform an NSLookup on AMS-DC1. nslookup AMS-DC1
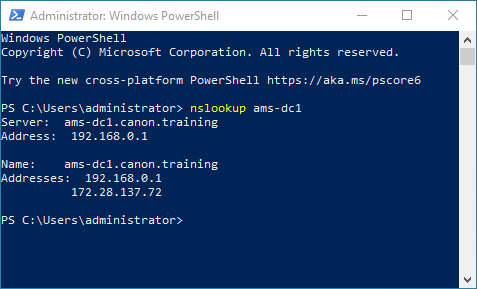
12. Notice that the server name of the DNS server has now been displayed.
13. Perform a lookup for the "Test" record. Why do you think it fails.
Switch to AMS-DC1
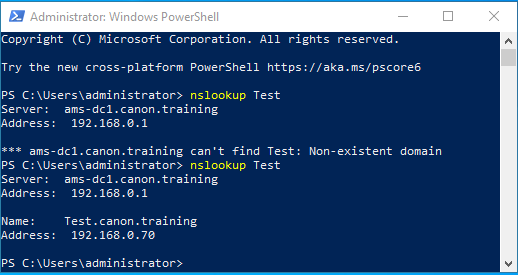
14. Open the forward lookup zone canon.training and create the required A host.
15. Return to the AMS-CL1 to confirm the fix.
Typically, when you need DNS services, your first and only thought is converting names to IP addresses via a forward lookup.
The reverse lookup is usually an afterthought or something that is not well maintained.
It is not required for forward lookups to work, but as mentioned above, some services may rely on it.
16. Ask your trainer for any real life examples where reverse lookup has been a problem.
