Services
As described in this training, a server is a computer providing services to itself or other computers. In the rest of this training, we are going to look in much more detail at two of these services, which are a vital part for network and internet connection, the DHCP service and the DNS service.
In Microsoft environments a service is a special type of application intended to provide features to the user and the operating system, that launches and runs in the background, without a user interface to click on.
We have briefly discussed what a domain is in computer terms. The domain is the secure boundary within which our services are supplied.
In order to work with some services, it is a requirement to join a domain. In this task you are just configuring services on a domain controller which is already a member of the domain it is the controller of.
1. On the domain controller AMS-DC1.
2. Open "Server Manager". Then open the tools dropdown.
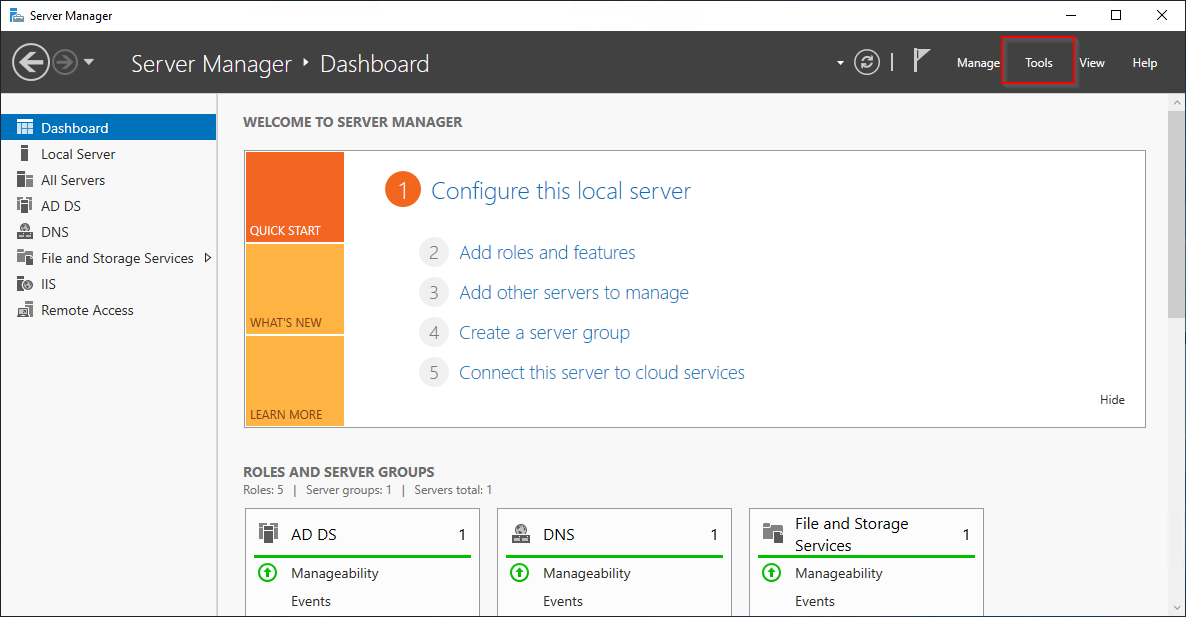
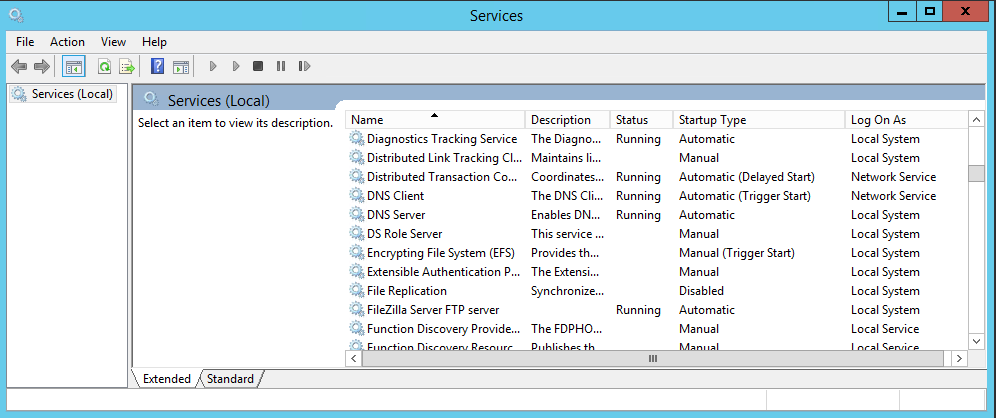
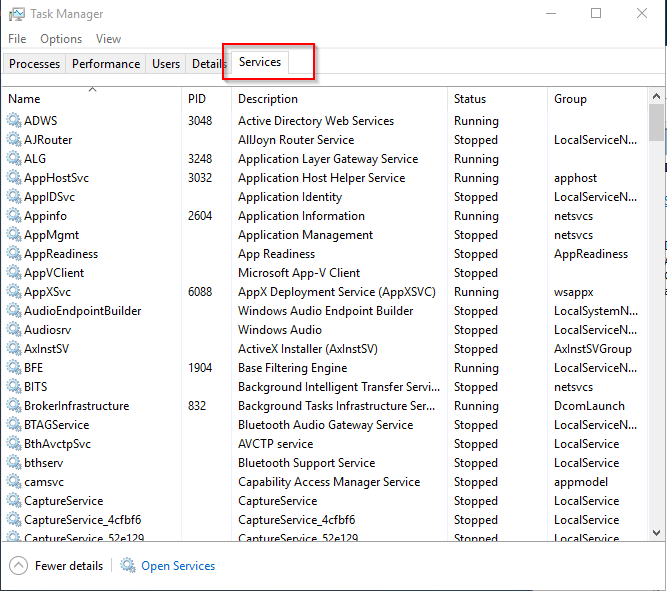
3. Select Services to open the snap in.
It lists all the services installed on your computer, whether they are running or not, while allowing you to start them, stop them, restart them, and access information on each of them.
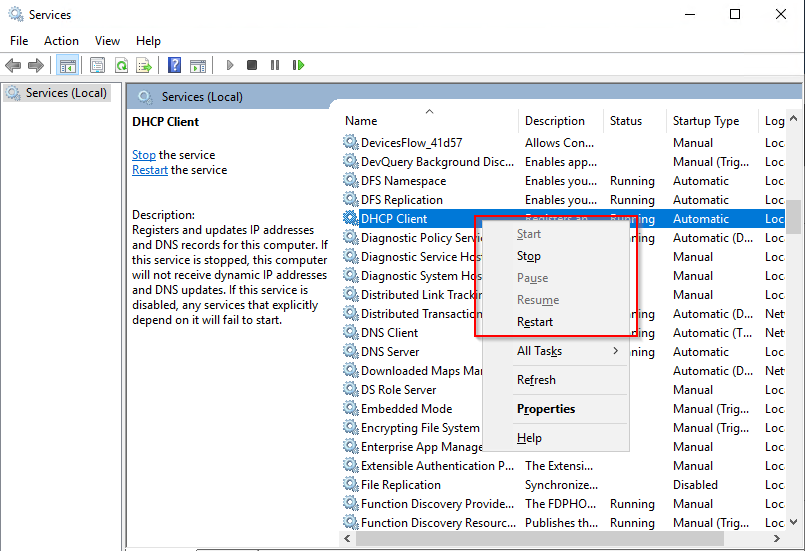
4. Simply right click the service you want to edit.
5. The option to start, stop and restart are available. Using these functions, you can often prevent the need to restart a system simply the service.
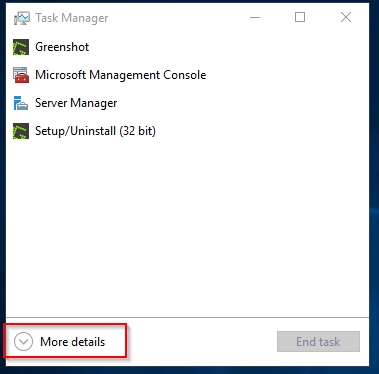
6. Services is also available in the full version of the Task Manager.
To open the full version of the Task Manager, click or tap More Details at the bottom of the compact view.
Here is what you can do from the Services tab of the Task Manager, in Windows 10 / Server 2022:
7. Sort the data displayed in the Services Tab of the Windows 10 Task Manager.
The tab is laid out in columns. You can click on any columns header, and drag it left or right to reorder the columns based on your preferences.
8. Click on a columns header to sort the list of services by the values displayed in that column.
Each column displays different data:
Name - Displays the name of the service.
PID - Displays a unique Process Identifier for each running service. These numbers can be used to match a running service with an error or event that lists the PID.
Description - Displays a brief description of what the service does.
Status - Shows whether a service is Running or Stopped.
Group - Displays the name of the service group, if applicable.
Unlike the Processes tab, the columns in the Services tab cannot be hidden from view.
9. Research an unknown service using the Task Manager
Reading the names of services can sometimes give you a basic idea of what they do but its not always easy. The names of most services are confusing, to say the least. Your best bet is to look to the Description column for more information.
This provides more information about the service than its name, but it may still not tell you what you want to know.
10. To learn more about a specific service, right-click on it to open the contextual menu. Then, click Search online.
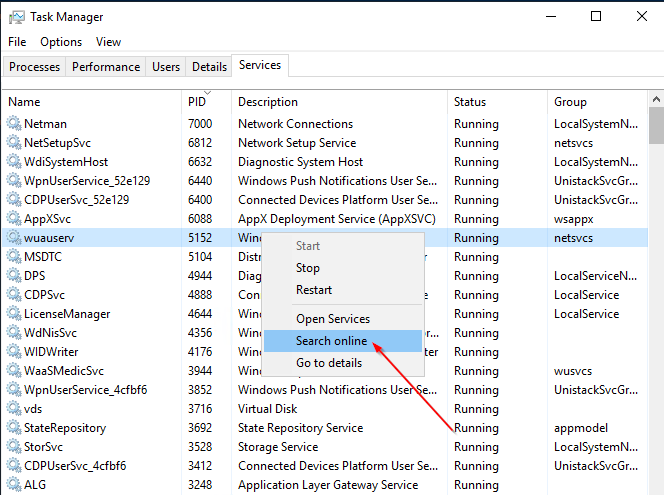
11. Check out a couple of links, and you should get an idea of what a service does and how important it is.
12. See details for a running service in the Task Manager
Each running service has a corresponding entry in Task Managers Details tab, allowing you to access more useful data about that service.
In the Services tab, right-click on any service, and then click or tap "Go to details."
Task Managers Services tab gives you a quick way to view and play around with Windows services, but it does not replace the Services tool.
Firewalls & Firewall Rules
A firewall is a network security device that monitors incoming and outgoing network traffic and permits, or blocks data packets based on a set of security rules.
Its purpose is to establish a barrier between your internal network and incoming traffic from external sources (such as the internet) in order to block malicious traffic like viruses and hackers.
Firewalls can either be software or hardware, though it’s best to have both.
A software firewall is a program installed on each computer and regulates traffic through port numbers and applications, while a physical firewall is a piece of equipment installed between your network and gateway.
Packet-filtering firewalls, the most common type of firewall, examine packets and prohibit them from passing through if they don’t match an established security rule set.
This type of firewall checks the packet’s source and destination IP addresses. If packets match those of an “allowed” rule on the firewall, then it is trusted to enter the network.
Microsoft Defender Firewall
A quick and easy check to see if a firewall is blocking your communication is to test with the firewall turned off.
Follow the procedure below to check if the local software firewall is causing the problem.
1. You can try this using the "ping" command from the server AMS-DC1.
You will be able to ping the AMS-DC1 from the AMS-DC1 (therefore the firewall is open on AMS-DC1) but you will not be able to ping AMS-CL1. You can however ping the AMS-DC1 from AMS-CL1.
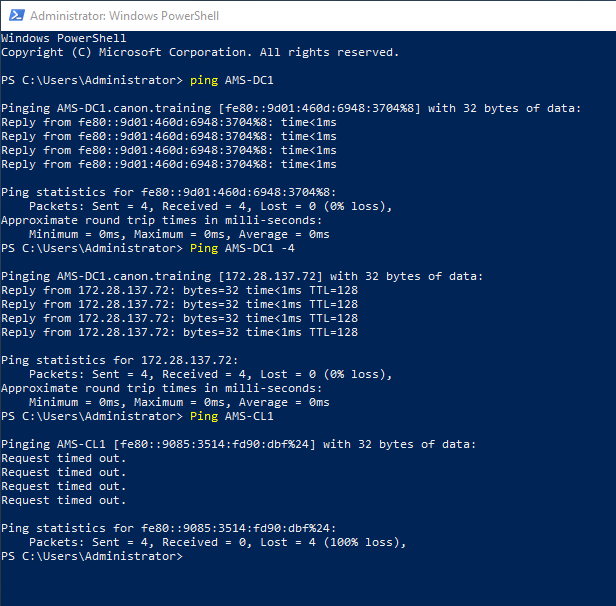
2. Perform the firewall task on the AMS-CL1 which is the machine that has the firewall rule blocking the comunication. We can deduce this from the ping replies.
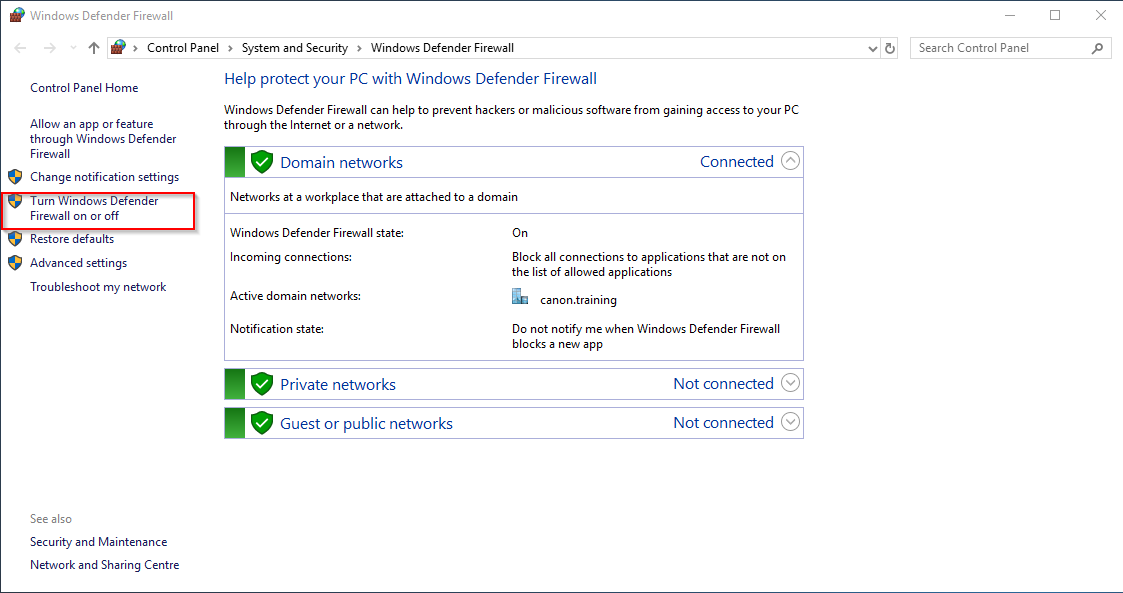
3. Select the Start button > Settings > Update & Security > Windows Security and then Firewall & Network Protection.
4. Open Windows Security settings
5. Select a network profile: Domain network, Private network, or Public network.
6. Under Microsoft Defender Firewall, the switch setting is On.
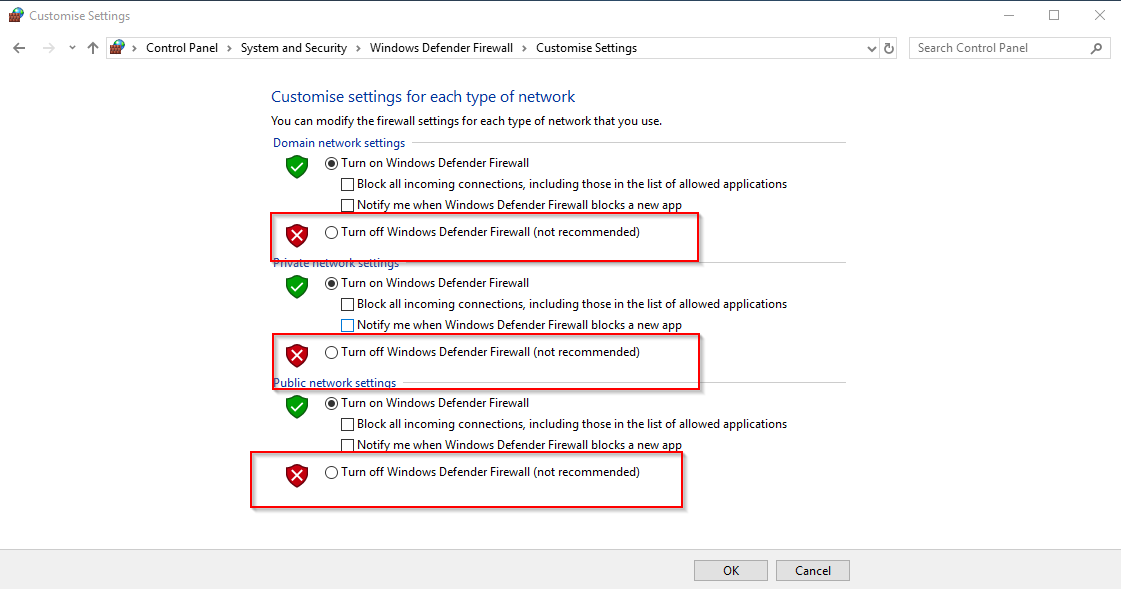
NOTE: If your device is connected to a domain, network policy settings might prevent you from completing these steps.
7. To turn it off, switch the setting to Off.
8. Test the connection then turn it back ON for the following task.
NOTE: Turning off Microsoft Defender Firewall will make your device (and network, if you have one) more vulnerable to unauthorised access (only use this method to prove firewall block exists).
9. Test the connection again and you will prove the firewall is blocking the ping.
If there is an application or simply a port to open, you need to use thats being blocked, you should allow it through the firewall, instead of turning the firewall off.
How to Allow Pings (ICMP Echo Requests) Through Your Windows Firewall
Now you will learn how to create rules in a windows firewall to allow traffic to pass. The process can be adapted to allow many forms of communication through the firewall.
When Windows Firewall is enabled with default settings, you can’t use the ping command from another device to see if your target is alive.
As we know the ping command works by sending special packets known as Internet Control Message Protocol (ICMP) Echo Requests to a target device, and then waiting for that device to send back an ICMP Echo Reply packet.
10. To enable ping requests, you will need to create two exceptions to allow traffic through the firewall - one for ICMPv4 requests and one for ICMPv6 requests.
11. You can use both the graphical interface of the firewall or you can use the commands listed below to create the required exceptions.
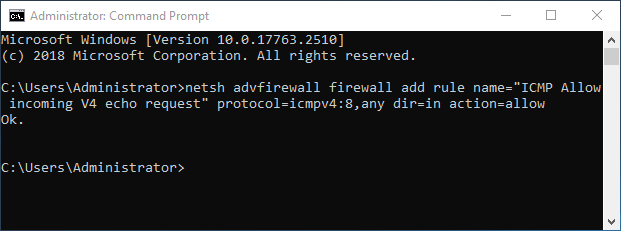
Either PowerShell or CMD will require elevated rights.
12. To create the ICMPv4 exception, type (or copy and paste) the following command at the prompt and then hit Enter:
netsh advfirewall firewall add rule name="ICMP Allow incoming V4 echo request" protocol=icmpv4:8,any dir=in action=allow
13. To create the ICMPv6 exception, use this command:
netsh advfirewall firewall add rule name="ICMP Allow incoming V6 echo request" protocol=icmpv6:8,any dir=in action=allow
14. Allow Ping Requests by Using Windows Firewall with Advanced Security
While the Command Prompt is the quickest way to add an exception to your firewall for ping requests, you can also do this in the graphic interface using the “Windows Firewall with Advanced Security” app.
15. Hit Start, type “windows firewall with,” and then launch “Windows Firewall with Advanced Security.”
16. In the left pane, right-click “Inbound Rules” and choose “New Rule.”
17. In the “New Inbound Rule Wizard” window, select “Custom” and then click “Next.”
18. On the next page, make sure “All programs” is selected and then click “Next.”
19. On the next page, choose “ICMPv4” from the “Protocol type” dropdown and then click the “Customize” button.
20. In the “Customize ICMP Settings” window, select the “Specific ICMP types” option. In the list of ICMP types, enable “Echo Request” and then click “OK.”
21. in the “New Inbound Rule Wizard” window, you’re ready to click “Next.”
22. On the next page, it’s easiest to just make sure that the “Any IP address” options are selected for both local and remote IP addresses.
If you want, you can configure specific IP addresses to which your PC will respond to a ping request.
23. On the next page, make sure that the “Allow the connection” option is enabled and then click “Next.”
24. The next page allows you some control over when the rule is active. If you want the rule to apply no matter what type of network it’s connected to, leave the options at their default and just click “Next.”
25. Finally, you need to give your new rule a name, and optionally a description. Use a descriptive name so others know what the exception is for.
26. Follow the same steps we just went over and set all the options the same you did for the ICMPv4 rule, however, when you get to the ports and protocols page, select “ICMPv6” from the dropdown instead of “ICMPv4.”
Lab Preparation:
To enable you to setup a DHCP server in the next section you will need to check a few configuration settings on your virtual machines. This step is only to ensure you understand the settings for a domain controller are controlled.
Step 1
We need to make sure the server has a static IP address within the DHCP scope we will build in the exercise.
1. In server manager select Local Server. In the server screen you will see the current IP address.
Select the current IP address to open the network connections.
2. Highlight the interface for training not internet (local not external). We will discuss the second NIC later in this training. Right click and select properties.
3. Select TCP/IP v4 from the list, double click.
4. Update the IP address as follows.
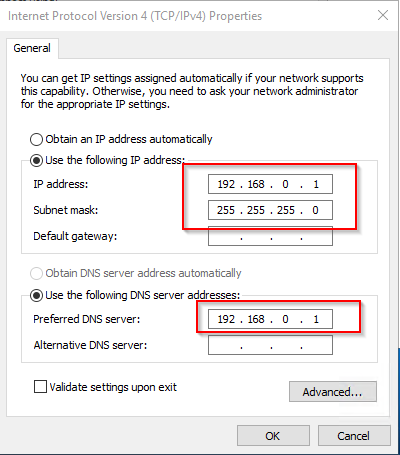
5. Now check that the client is also fixed IP on 192.168.0.2. with the Gateway 192.168.0.1 and the DNS Server also 192.168.0.1
